DETAILS
About our Harkaway Bluestone Stepping Stones & Blue Stone Steppers:
These bluestone stepping stones are an easy way to add a custom playful feature in your outdoor space. As a result, you don’t need a tiler – you can lay them easily yourself! Use these bluestone pavers to draw the eye to areas in your garden such as a pond, firepit, bbq area or front porch. Due to the minimalist organic design, these bluestone stepping stones complement both modern and traditional home designs.
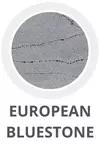
Genuine Harkaway Bluestone contains between 30-50% catspaw, it is a natural occurrence in all Bluestone sold here in Australia. You have the option of filling these when grouting with our Bluestone colour matched grout or to leave them open as nature intended.
Sizes available are:
SMALL: 400-450mm maximum diameter
MEDIUM: 500-750mm maximum diameter
LARGE: 800-950mm maximum diameter
X-LARGE: 950-1200mm maximum diameter. *These are elongated in shape
Choose from 20mm and 30mm thicknesses.
You can create a cohesive garden look by using the same size. Although, many of our customers have also created striking garden looks by mixing and matching sizes together. The Basalt pieces are available in both 20mm and 30mm thickness. Surface finish is sawn and will give a non slip surface to your Basalt Paving
Priced from $22 per piece. Please not these are medium to large sized natural Basalt Flagstones with a natural edge. Diameters are measured across longest dimension as they are irregular natural shapes. The extra large stepping stones are sliced from elongated boulders (some would say more sausage like in apperance), whilst all the others are sliced from a more semi rounded irregular shaped boulder.
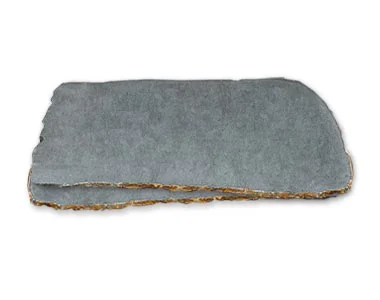
Image of Harkaway Bluestone Stepping Stones in the oblong (sausage) shape
If you have any questions at all about our bluestone stepping stones, please feel free to contact our friendly team.
Find out more about bluestone >>
INSTALLATION/MAINTENANCE
Here’s a guide on installing 30mm bluestone stepping stones into your lawn as a pathway:
Preparation:
- Plan your path: Sketch the desired route, considering natural flow, foot traffic, and spacing (generally 30-40cm between stones). Mark the path edges with string or spray paint.
- Excavation: Dig out the marked area to a depth of approximately 40cm, ensuring a level base for the stones. Consider an additional 10cm for drainage if needed.
- Base layer: Create a stable base with compacted crushed rock (10-15cm thick). Use a tamper to ensure evenness and firmness.
Laying the Stones:
- Drainage: If necessary, lay down a weed mat and perforated drainage pipe along the base layer to channel excess water away.
- Sand bedding: Add a 5cm layer of sharp sand over the base, spread evenly. Level the sand using a screed or straight edge.
- Lay the stones: Carefully place each stone onto the sand bedding, ensuring level placement. Use a rubber mallet to gently tap them into position. Check for even spacing and adjust as needed.
- Filling gaps: Fill small gaps between stones with sand and tap them in firmly. For larger gaps, consider crushed rock or gravel, ensuring stability.
Finishing Touches:
- Edging: Optional: Install edging material like bricks or pavers around the pathway for a clean look and to contain the stones.
- Compacted sand: Apply a final layer of sand around the stones to fill any remaining gaps and ensure stability. Compact the sand thoroughly.
- Optional: Sealing: To enhance the color and protect against stains, consider applying a penetrating sealer specifically designed for natural stone. Follow the manufacturer’s instructions carefully.
Additional Tips:
- Wear gloves and appropriate footwear during the installation process.
- Use a spirit level to ensure stones are level both horizontally and vertically.
- Work in sections to avoid disturbing the entire excavated area at once.
- Consider professional help if you’re unsure about any step or lack the necessary tools.
By following these steps, you can create a beautiful and durable bluestone stepping stone pathway that will enhance your lawn for years to come. Remember to adjust the process based on your specific soil conditions and local climate.
Here’s a guide to installing 20mm bluestone stepping stones into a lawn pathway using a sand and cement slurry:
Preparation:
- Plan your path: Sketch the desired route considering natural flow, foot traffic, and spacing (generally 30-40cm between stones). Mark the path edges with string or spray paint.
- Excavation: Dig out the marked area to a depth of approximately 30cm, ensuring a level base for the stones. Consider an additional 5-10cm for drainage if needed.
- Base layer: Create a stable base with compacted crushed rock (10-15cm thick). Use a tamper to ensure evenness and firmness.
Sand and Cement Slurry:
- Ratio: Prepare a sand and cement slurry using a 4:1 ratio (4 parts sand, 1 part cement) with enough water to create a thick, workable consistency. Avoid making too much at once.
- Application: Spread a thin layer of the slurry (about 1-2cm) over the compacted base, ensuring it fills any unevenness. Work in small sections to maintain proper consistency.
Laying the Stones:
- Wetting: Before placing the stones, dampen their undersides slightly to improve adhesion.
- Laying: Carefully place each stone onto the wet slurry, ensuring level placement and proper spacing. Use a rubber mallet to gently tap them into position. Check for evenness and adjust as needed.
- Grouting: Fill small gaps between stones with additional slurry using a trowel or your fingers. Ensure no air pockets remain. For larger gaps, use larger stone chips or pebbles instead.
Finishing Touches:
- Cleaning: Once all stones are laid, wipe any excess slurry from the stones and pathway surface with a damp sponge.
- Curing: Leave the pathway undisturbed for at least 24 hours to allow the slurry to cure properly.
- Compacted sand: Optionally, apply a final layer of compacted sand around the stones to fill any remaining gaps and enhance stability.
Additional Tips:
- Wear gloves and appropriate footwear during the installation process.
- Use a spirit level to ensure stones are level both horizontally and vertically.
- Work in sections to avoid disturbing the entire excavated area at once.
- Be mindful of weather conditions and avoid laying stones during rain or extreme heat.
- Consider professional help if you’re unsure about any step or lack the necessary tools.
Important Note:
Using a sand and cement slurry for 20mm bluestone stepping stones might not be the most recommended approach due to the stone’s thinness. The weight of the stone may contribute to cracking or movement over time. Consult a professional or consider alternative methods like dry-laying with sand bedding or using a thicker adhesive specifically designed for natural stone.
If you have any questions at all about our bluestone stepping stones, please feel free to contact our friendly team.
Find out more about bluestone >>


Reviews
There are no reviews yet.